Monday, October 30, 2017

Happy Travels with Quick Quotes

Greetings friends and fellow crafters. LeeAnn here today with my last post for October. Using the challenge theme of Memorabilia I decided to use a couple things from my trip to Ft. Lauderdale in September.  


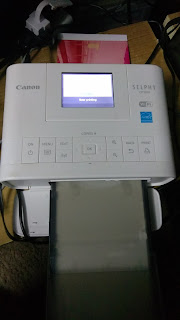
I took Amtrak from home to Ft Lauderdale rather than making the four hour drive. I love taking the train as there is wifi, snacks, beverages and comfort. Not having to make stops along the way really makes it nice. SO, when I started working on this project I used my Canon Selphy to print the photos in 4" x 6" size. I really love this little machine, as it has a cartridge with the ink cartridge which is exactly enough ink for however many pieces of photo paper came with the pack. 


I love being able to send directly from my phone using the Canon print app. Once the photos is sent, the machine's screen says busy and it starts, it brings the paper from the carrier and first prints yellow.


It then sucks it back in and prints the red, then one more pass with the blue and the photo is complete. 


So, once my images were printed, I decided which paper I was going to use. My final decision was the front and back of Mulberry 103. I took two sheets of this paper and used one for my base and one to cut for mats for my photos.

While on this trip I took a day for myself and rode the Tri-Rail to Miami to spend the day with my Quick Quotes Team Mate Martha. We had a great afternoon/evening, and then I took the Tri-Rail back to Fort Lauderdale. That ticket is stuck in my coffee wrap. And I used the lower left photo as a pocket to hold my train ticket. 

I hope you have enjoyed my project today. Thank you for stopping by. 

Quick Quotes Items used:
Mulberry Paper Pack
Adventure Awaits Quotes/Phrases
Canon Selphy CP1200

Saturday, October 28, 2017

Skipping Stones and Kicking Cancer's Booty

Greetings friends and fellow crafters. I'm here today with a project for the Skipping Stones design team. This project is dedicated to the many men and women out there fighting this horrible disease called Cancer. I have had many family members and friends fight this disease. Some have been successful, some have not, some are still fighting and a tough fight was fought by all.

Using Worn Lipstick Distress Oxide I inked up an A2 size piece of Watercolor Cardstock. I then used my distress sprayer and had a little waterfight with my paper. From there I used my heat tool to dry this fun creation.
Using my Stamp Press I then used Versafine Onyx Black to stamp both the sentiment and boots stamps from Skipping Stones Designs Cancer Schmancer stamp set. Again using my heat tool only because I am impatient for things to dry at times.
Using Simply White Nuvo Crystal Drops I made 3 little drops at the bottom right corner and my piece was finished.

Roxanne, Fran, Uncle Ronnie, Aunt Carolyn, Uncle Jimmie, MIL Sharon and many others, This post is for you!!!

Thursday, October 26, 2017

October Inspiration with Joy Clair Stamps 2nd Edition

Greetings friends and fellow crafters. LeeAnn here today with my second set of projects for the Joy Clair team. Have you ever had a stamp set just scream at you with how it wants to be used, and so you get started and while not knowing how it is going to turn out, you just let loose? Let me say that happened with this adorable set called Out of This World.


 From the beginning I knew the finished project was going to be a slider card with the rocket going from the Earth to the Moon, it can also spin around and come back.
 To make this project I used multiple colors of distress inks including Black Soot, Seedless Preserves, Wild Honey, Salty Ocean and Peacock Feathers, layers upon layers. Once dry I splattered with a mixture of white acrylic ink and water.
The images were stamped with Memento Tuxedo Black and colored with Zig Clean Color Real Brush Markers.
I stamped the sentiment with Versamark and used Recollections Silver Embossing powder and my heat tool to finish it off.
I used a Lawn Fawn slider die to cut the track, and foam dots and a penny to complete the mechanism. I will make another soon, and video the process, I am sorry I did not think to film or photograph it this time.
I used double stick tape to adhere the elements, and with that this project was complete.

My next project today is using Christmas Coffee. This set is a favorite, as it can be used along with our Ugly Sweater background set to design the mug, as well as the image with this set.

I had fun with this image, first I stamped several impressions of the coffee mug with Memento Tuxedo Black in case of error while designing. 
After using the Scan n Cut to cut it out, I put figured out which of the two mug designs I wanted to use. After going through my background paper I found this paper pack from Recollections I purchased in 2015 and had not used yet, and the decision was made for the design.
Using an MFT die and my Big Shot I cut a 3" by 4" rectangle from the background paper, then using a Spellbinders die I cut the 4" by 5.25" rectangle from cardstock. I then used two cross stitched dome dies and cut out of green and white cardstock and mounted them together with double stick tape. I did have to trim the bottom of the green layer in order for proper fitting. 
For the coffee mug design I alternated Cottage Ivy and Lady Bug dew drop Inks from Memento in order to get a true pattern. Let me just say I used 4 of my cup cuts to finally get one I was really happy to use. 
I adhered everything down the way I wanted it on the A2 base and then positioned the Merry Christmas sentiment stamps (I really do love that they are separate stamps in this set) and then stamped it with Memento Tuxedo Black. With that this project was complete. 


I I hope today's projects has given you some fun inspiration!!!


Thank you for joining us and don't forget to follow on our social media venues to be the first to hear the news about sales, promotions and giveaways!
Thank you so much for stopping by today. Have a wonderful and blessed day!

Friday, October 20, 2017

Quick Quotes MY HERO with LeeAnn

Greetings friends and fellow crafters. LeeAnn here with my mid month project for October. If you remember my first project I stated my daughter was leaving for Coast Guard Boot Camp, well time is getting closer and I made her a card for her going away dinner.


Using the Red, White, and Blue paper from the July Club Q kit I was so happy fellow teammate Martha gave me when visiting her earlier this month.
  

So, this was the wonderful paper that I had to work with, and trying to decide what I wanted to use was not easy. In the end I used the a pretty red distressed page as my to panel and cut a banner shape from a chevron piece. I then cut a white panel on which to stamp the sentiment which is from Verses Rubber Stamps.

My base is cut at 4.25" x 5.5" with the red panel cut at 4" x 5.25". I used Royal Blue Powderpuff Ink to stamp the sentiment. I adhered the red panel with Tear It! Tape, and the banner with foam squares.

I hope you enjoyed my project today, and please keep my daughter and her family in your thoughts as she goes through this rough time being away.

Quick Quotes Product Used:

July Club Q paper pack
Royal Blue Powderpuff Ink

Thursday, October 19, 2017

Otterly Great Birthday

There is a big birthday coming up in the next week, my granddaughter will be 1 year old on the 26th, so this card will be given to her.
Her mom has always loved otters, I remember vising the National Zoo in DC and she disappeared and that is where she went, granted she was right around the corner from where we were standing but dang, she was a week away from turning 7 and this mama was freaked out. SO, when this stamp set came out I had to have it, and finally pulled it out of my stash to use it for this challenge.

SO, here it is....


  • My first step in making this card was to cut the circle with my big shot and a circle die from Spellbinders.
  • I then used a stencil from Die Cuts and More and Bo Bunny glitter paste to make the water impression feature. 
  • Using Recollections 110 lb cardstock I stamped out my 3 otters using StazOn ink in Hydrangea Blue, Saddle Brown and Stone Grey. I stamped the 3 packages using Memento Angel Pink.
  • Once I had the images cut out I colored the otters using Rich Cocoa, Desert Sand and London Fog, and added a touch of Angel Pink to the ears. 
  • The card base is Recollections 110 lb, the top panel is from a Momenta Textured Cardstock pack and attached with Tear It ! Tape, the sentiment was stamped with the Hydrangea Blue. The water feather element is attached with foam tape, and tear it tape was used to attach the cute little otters.
  • The final touch was to use On Point Glue to attach the packages. 
I hope you have enjoyed my project. 

Friendship Blessings with Kennedy Grace Creations

Greetings friends and fellow crafters. LeeAnn here with a project made for the Kennedy Grace team, I chose to make a fun water color card using the new Friendship Blessings stamp set and a few sequins from the Autumn Blessings Mix


The process I used to make this card is as follows:
  • Using VersaMark I stamped the image on watercolor cardstock.
  • Using Imagine Clear embossing powder and my heat tool I heat embossed it. 
  • Using Gansi Tambi watercolors from Kuretaki I painted the stems and flowers, choosing the colors in the Autumn Blessings mix.
  • Using Distress Oxides in Broken China and Cracked Pistachio I completed the background.
  • The next step was to add the sentiment which I did using Memento Tuxedo Black ink. 
  • After the project was completely dry, I used a white gel pen to add highlights to the flowers. 
  • I used On Point Glue to add the sequins to my project. 


I hope you have enjoyed my project today and will come back daily and see what my team mates have created for you.


Wednesday, October 18, 2017

October Inspiration with Joy Clair Stamps 1st Edition

Greetings friends and fellow crafters... LeeAnn here with a post using two sets of Joy Clair stamps and a little fun I decided to have with them.

First up is October Fun, these little kids just really struck me when I saw them and I knew right way they were going to be made into goodie bags. We have very few children that come by on Halloween, last year was only our two great nephews at the time ages 4 and 1, and that was just fine with us, we got the leftovers :)

The first thing I did was to figure out with background paper I wanted to use for each little baggie.  
I used my Big Shot to cut 5 circle dies that would fit the sentiments.
After stamping each of the images and sentiments with Memento Tuxedo Black ink, I used my Scan N Cut to cut the images of the little Halloween Kids.
And then my Spectrum Noir Alcohol markers to color them. 
I used double stick tape to attach the sentiments and kid, as well as the topper to the baggies. I made sure my candy matched the images that were packed inside. 
I did change out the candy in one baggy, and then mailed them all off to a friend. They have already been received so I hope she and her grandchildren enjoyed them. 


My second project today comes from our Color by Faith line. This set is sentiments, and it was about 1am and I was talking to a friend online while thinking about what I was going to do, and it hit me. I made the card and then thought wow, is this too gory, then realized... it will not go live until around Halloween, and it fits the sentiment, so it will work.

The image is from the Silhouette design store, by Sophie Gallo. I purchased this image and never had a use for it. After opening it up in the Silhouette software, I made a few sizing adjustments and used the print feature.  I then cut the panel to the proper size 3.75" by 5" and stamped the sentiment. I then mounted on a 4" by 5.25" black panel, which was then mounted on an A2 base. 
I hope you have enjoyed my inspirational projects today!!!

Thank you for joining us and don't forget to follow our social media venues to be the first to hear the news about sales, promotions and giveaways!
Thank you so much for stopping by today. Have a wonderful and blessed day!

Monday, October 16, 2017

Skipping Stones Chocolate Insanity with LeeAnn

Greetings friends and fellow crafters, LeeAnn here with my first post as a design team member with the Skipping Stones Design Team!!!

Image may contain: 12 people, people smiling

 In making my project today I used the Chocolate Volume #2 stamp set. I was in the mood for chocolate so this one really screamed at me. 


The steps I used to make this project were as follows:


  • I stamped the strawberry 3 times using Memento Tuxedo Black ink. 
  • I then used my Scan n Cut to cut out the image.
  • Using Memento Dual Markers in Rich Cocoa and Ladybug I colored the strawberries leaving them all different, one all White Chocolate, one mostly Dark Chocolate and one swirled. The leaves for the strawberries were then colored from light to dark based on the same. 
  • The background is from a DCWV paperpack called Sweet Stack. I was drawn to this as it just exudes different colors of chocolate in my opinion. 
  • I used a white cardbase made from Recollections 110 lb cardstock and inked the edges with my Memento Rich Cocoa dew drop. This is an A2 card base.
  • My topper layer is cut to 4" x 5.25". 
  • The sentiment tag is attached using a red brad.
  • The strawberries on the right and left are attached with Tear It! Tape. The one in the center is attached using foam adhesive.
  • My final step was to use Clear irRESISTible to color the Dark Chocolate and Strawberry caps to give that added element of pop. 
I hope you have enjoyed my project today. Please be sure to hop along and see the rest of the teams projects.


LeeAnn YOU ARE HERE


Tuesday, October 10, 2017

Quick Quotes Mom's Coming Home

Greetings friends and fellow crafters, LeeAnn here today with my first post of October with the Quick Quotes team.

My daughter leaves later this month for Coast Guard Boot Camp and leaving her two children with her husband for 8 weeks. My grandson is 3 and granddaughter will be 1 two days after mom leaves, so this is a hard time. Thinking about this I decided to make it the focus of one of my projects, and while Junior is learning his numbers and counts quite well, why not help out a little with counting backwards. I used the Anchors Aweigh paper pack and a few items from around the house to take care of this project.

First I took a sheet of Anchors Aweigh #108 and cut to 8" x 10" to fit the frame I had. I then was playing with it to decide which side I liked best staying with the theme. Using my Scan n Cut I cut the words Mom Comes Home In Days out of Anchors Aweigh #100. I also cut out the numbers 0-9 twice. Deciding I needed some red to make things POP, I used a piece from the Serenade paper which was in the September Club Q Kit, and trimmed to fit my words.


Once I had the layout chosen, everyone was adhered using tear tape. The count down is set so that each day my son in law can help Junior change the number closer and closer to mommy coming home.


Quick Quotes product used:
Anchors Aweigh #108
Anchors Aweigh #100
September Club Q


I hope you have enjoyed my project today. Please come back and see the projects the rest of the team has for you throughout the month.


Saturday, October 7, 2017

World Card Making Day with Joy Clair Stamps


Hi there friends and fellow crafters, Happy World Card Making Day 2017!!! Today I am here with a fun project the team worked on together.

The idea behind the project was each member decorated a 3" x 3" square and then cut it into 1" x 1" squares and mailed one to each member of the team and kept 1 for themselves. Once the "inchies" were received we made a card using them in one way or another. This was quite a fun project to work on with the team, and really goes to show how we work well together given the fact most had the same idea for which set to use.

Unfortunately I am traveling and 2 of the "inchies" did not arrive for me to use in my project.

These are the inchies received:


My completed project:


In order to create this project I personally used 3 of the Joy Clair stamp sets. I used the tree from Happy Halloween, the grass sprouts from If You Dare, and the mummy from October Fun.

I used Memento Dew Drops for all my inking with this project, I used Rich Cocoa for the Tree base, Espresso Truffle for the Tree Trunk, Cottage Ivy for the Grass base, j
Bamboo Leaves for the Grass Sprouts and Summer Sky for the sky background.

I then used Tear Tape to adhere the inchies to the base, some to simulate the tree leaves, and one to act as the Halloween bag for the little mummy child. The mummy is attached using foam squares as is one of the inchies for added dimension.

I do hope you enjoyed this project today as much as I had fun making it. Inchies not received by the time this project was created will be used in a future project.

As mentioned, we have a fantastic line-up and three Special Guest Designers joining us today, all of them had been winners of our Challenges!!!. Check out the Hop order below: 
LeeAnnMckinney you are here!!!

>>>HOP ALONG FOR THE CHANCE TO WIN PRIZES<<<

We're giving away three Stamp sets from Joy Clair Store! Just leave a comment on every destination along the Hop to be in with a chance to win!
WCMD 2017
Comments close at 23:59 EST on 7th October 2017.

Don't forget that we have a lot more going on throughout today on Joy Clair blog too! We hope to see you back here for the rest of the events - there will be lots of opportunities to be inspired and to get crafty with us!
Happy hopping!

2017 WCMD Challenge with Joy Clair Stamps


Greetings friends and fellow crafters... LeeAnn here today with my project for World Card Making Day Challenge 2017 using two of the Joy Clair Stamp sets. When given the option of theme to use for my project I chose RAINBOW and  I am so glad I did. I had fun with this.


Like many other crafters these days, I have been experimenting with Distress Oxide inks. I made for different backgrounds a few nights ago, each one different than the other, and all will be seen in upcoming projects the next month or so. The background on this project is the final result of my inky fun. 
Each time I made a background I cleaned up my mat with the same baby wipe and realized hey, this could be interesting. I laid it flat on my mat and smooshed a 4.25" x 5.5 " piece of distress watercolor cardstock onto the wipe. the end result after drying is the background on this project.

I then used my stamp platform to position the frame from the Rustic Christmas Stamp Set on a piece of Recollections 110 lb cardstock, I made multiple impressions using Memento Dew Drops Rich Cocoa in  case I was to mess up when I stamped the sentiment. I then used the Brother Scan n Cut to cut the image leaving a .04" border. 

I positioned the sentiment from Rustic Occasions Stamp Set and used 3 different Memento Dewdrops (Peanut Brittle, Toffee Crunch and Cottage Ivy) to stamp giving it an Ombre look. 

To complete this project, I have an A2 base of kraft cardstock, the next level is 4" x 5.25" of olive green and then the watercolor panel cut at 3.75" x 5". All layers are adhered using Double sided Tear Tape from Imagine Crafts. The sentiment frame is adhered using foam squares for added dimension. 

If you choose to play along, you can link your RAINBOW inspired project right here on my blog.


I hope you have enjoyed this bit of inspiration, don't forget to follow Joy Clair on our social media venues to be the first to hear the news, sales, promotions and giveaways!
Thank you so much for stopping by today. Have a wonderful and blessed day!

Thursday, October 5, 2017

No Tricks with Tape Technologies

Greetings friends and fellow crafters. LeeAnn here with my project for Tape Technologies October 2017. This month is a crazy one, and it only figures that Halloween be part of it. while my project is all about no tricks, it seems like that is all that is happening to me these days. More about that later.

For my project I used the Transparent Glitter Vinyl in Black and Orange.

First I went to Dollar Tree and found a double insulated coffee much I wanted. I then used my Silhouette Cameo to cut the vinyl image I purchased in the Silhouette Store.


Once the cutting was complete I used my weeding tool and light box to pull away the negative sections.


I then layered the black over the orange and left a slight offset. Once I had the vinyl aligned the way I wanted it, I stuck it to the cup. I now have a great cup to use on Halloween when waiting for any of the neighbors to come by. 


Here is the chart with all glitter options available.


As far as the tricks. I am traveling for 2 weeks helping out my MIL who had surgery. I thought my husband had my laptop, and he thought I did. WELL, we were halfway here (over 200 miles) on the train when I realized it wasn't with us. I really needed a new one anyway, so bought one the next day. It was WAY too small. Took it back that afternoon and traded for a larger one. Yeah, how about this morning the operating system is not working, unable to be found and will not reset. so it had to go back today. Lucky I was able to find one more that I am so far happy with.
Good grief... no more tricks, I really need only treats after this.

Have a crafty day.


Kennedy Grace Mood Board Inspiration for October

Greetings friends and fellow crafters. LeeAnn here today with my take on the Kennedy Grace Designs October Mood Board. If you are not familiar with mood boards they are great jumping points for a project, whether you use one of the images as the inspiration or the color palette alone. 


For my project today I decided to use the color palette, starting with the black and going from there. Using the Just A Rose Stamp Set, I stamped the Rose image using VersaMark clear ink, I then sprinkled Perfect Pearls in Copper over the image and brushed off any excess. I then fussy cut around the image to use it for my project. 
I then prepared my layers for the card base. my main base is Kraft cardstock in a2 size. my next layer which is purple was trimmed to 4" x 5.25", and then the green trimmed to 3.75" x 5". I used Tear Tape to adhere the layers together as well as the rose.
I used a piece of black cardstock to make a fish tail banner, I stamped the sentiment using Memento Tuxedo Black on Kraft Cardstock, adhered the sentiment using the Tear Tape and the banner with foam adhesive tape. With that my project was complete. 


I really hope you have enjoyed my project today. Please stop by the Kennedy Grace Creations Shop to see the other great stamps and sequin mixes available today. 
Be sure to stop by our blog to see the inspiration the rest of the team is bringing your way.

Wednesday, October 4, 2017

Peek A Boo Project Inspiration with LeeAnn

Greetings friends and fellow crafters, LeeAnn here with three projects I have made using new stamp sets from Peek A Boo Designs. I have to say I love this release and it was really hard figuring out what to use for my first post. 


For this first project, I used Distress Oxides in Picked Raspberry, Fossilized Amber, Cracked Pistachio and Broken China and smooched them on my craft mat. I then spritzed with water and ran my watercolor card-stock through the inky fun. I set the page aside to dry.
I then used Memento Markers in Ladybug, Cantaloupe and Dandelion to color my flowers. The stems are colored using Cottage Ivy Dew Drop and a Fantastix.
I cut the watercolor panel to  3.75" x 5", mounted that on a white panel cut 4" x 5.25" and mounted those on a Kraft a2 card base using Tear tape. The flower stamp was cut using my Scan N Cut and mounted with foam tape for added dimension.


My next project also began with Distress Oxides, in the colors Cracked Pistachio and Broken China. Using the same technique as above I smooched the inks on my craft mat, spritzed with water and ran the card-stock through. I wanted it to appear as the green was land and the blue the sky. 
The little panda's with Balloons were cut using my Scan N Cut. The balloons were colored using Spectrum Noir Alcohol Markers from left to right the colors used were LG4, LY1/CT1, FS8, OR1, LV2 and BT6. 
The top panda is attached with foam adhesive and Tear Tape on the balloon, while the lower panda is attached with Tear Tape and the balloons with foam adhesive. 


This one for last as I had so much fun trying to decide what to do and it was honestly the easiest. The fish are cut with my Scan n Cut, Using the "Rule of Three" I chose to use 3 fish, each colored with the same Memento Tangelo color, just each one colored differently. One is completely colored, one is white with Tangelo highlights while the other is Tangelo with white highlights. The sentiment "Best Wishes" I thought went with this perfectly. 
The base is an a2 in white cardstock, with a layer of burnt orange to pull out the Tangelo color cut 4" x 5.25", and the blue marbled is from a Ms. Sparkle & Co. from Joann's paper pack. The bodies of the fish is attached using Tear Tape while the tails are curled up. The sentiment is attached using foam adhesive. 

PEEK A BOO ITEMS USED....

Madhubani Stamp Set
Panda Hugs Stamp Set
Rocco Stamp Set

Other Items used...

Imagine Crafts Memento Dew Drop Cottage Ivy, Tangelo
Imagine Crafts Memento Marker Lady Bug, Dandelion, Cantaloupe
Imagine Crafts Fantastix
Imagine Crafts Tear Tape
Spectrum Noir Markers
Recollections Cardstock 110 lb
Ms. Sparkle & Co. Marble Paper Pad
Ms. Sparkle & Co. Foam Tape
Brother Scan N Cut