Wednesday, June 28, 2017

Home of the Latte

SO, a couple weeks ago the design team for Joy Clair Stamps received a package with two new stamp sets for a project for last month. I made my project and immediately started thinking of another. 
The two new sets are the Grungy Flag Background and Happy Fourth
Well I decided to add in Coffee Lovers...

SO... While yes this is the Summer theme Coffee Hop, I decided... Fourth of July happens during the summer... but Patriotism is everyday, and for that matter, so is coffee... So with that I bring you my project:

I used Memento Lady Bug and Danube Blue Inks on this project. The paper is all Recollections, and the bakers twine is from Dollar Tree. 

I hope you have enjoyed this project. I am submitting it to the Summer Coffee Lovers Blog Hop. 
#‎summer2017clh

Summertime Relax and Enjoy the Java

Greetings friends and fellow crafters. LeeAnn here with Quick Quotes and a shaker card I made with the Anchors Aweigh paper pack.

To make this card I used AW100 to make a front panel of 4" x 5.25". I had this card base in my stash from JilliBean and I situated the panel so I could trace the coffee cup cutout onto the paper ad then use my Scan N Cut to cut it in the top panel. 

I then cut a 4" x 5.25" panel for the inside out of the same AW100. In the June Club Q Kit there were some stencils that had the words Relax and Enjoy. I used the Sunset Powderpuff Chalking Ink to add the words to the inside of the coffee cup and the top of the card panel. 

To finish up this card I added some Sun Rays colored sequins to the inside of the shaker cup and sealed everything together with double stick tape. 

I hope you have enjoyed my project today. Thank you for stopping by.  

QQ Products Used
Anchors Aweigh AW100
Powderpuff Ink Sunset

Non QQ Products
JilliBean Coffee Cup Shaker Card Base
JilliBean Coffee Cup Shaker
Sun Rays Colored Sequins 
This project will be entered in the Coffee Lovers Summer Blog Hop

Joy Clair- Picture Perfect

Hi there friends and fellow crafters. LeeAnn here with a project I had fun making using the Joy Clair stamp set called God's Focus.

This was a fun project, and I have actually had it ready for a little while. This was the first thing I thought to do with this stamp set, and hope you like it. 
I had just bought some new ink pads and went down the line with them in rainbow order to make this card. Using my 8.5 x 6.5 stamping tool the first trick was to figure out just where to put the camera so I would be able to stamp both the rows and columns only moving the paper but not the stamp itself. 
SO, once I had that part figured out I was ready to start stamping. I used Ranger Dye inks for this in Ladybug Red, Goldfish Orange, Sunshine Yellow, Cactus Green, Seaside Aqua, Denim Blue, Magenta Violet, and Jelly Purple.
Once this step was complete and I had all my images, I went to my bigshot with 3 of my postage stitched dies and cut out a large and small image from white cardstock and a medium image from mirror. Once again I went back to my stamping tool and stamped the sentiment "I'M MADE Picture Perfect" in the small cut. I affixed the small and medium to the large with double stick tear tape, the large base was attached with foam tape to the base. And once again I remembered the "bling theme" so I found my silver glitter enamel dots and put them as the lens of the visible camera lenses. 

I hope you have enjoyed this project and it has given you an idea of a project you can make with this set as well. Thank you so much and let's get crafting. 

Tuesday, June 27, 2017

Stencil and Glitter Paste, Oh What Fun!!!

Greetings friends and fellow crafters, LeeAnn here with the next project using Gina Marie's Stencils. This time I used the Geometric Pattern Stencil.  

With this project I used Bo Bunny Glitter Paste in Blue. Until this project I had never used Glitter Paste before, but I did go back out and get another bottle that will be used in the next stencil post. 


This Paste gives a great texture just like embossing paste and texture paste, with the added shimmer shine of the glitter. And who doesn't love glitter?
Using the same steps as the prior post, I first taped down the stencil, and using my palette knife I stirred up the glitter paste then smoothed it on over the stencil. Once it was completely smooth I scrapped excess off and back into the jar and capped it. I then carefully lifted the stencil so as not to smear and immediately washed both the knife and stencil in warm water. 

Once this was complete, I set the panel aside to dry. I stamped the Daisy from Joy Clair Springtime Flowers with Versamark and used Gold Embossing Powder and heat set it. 
I used a banner die to cut the white sentiment panel and used Memento Black Dye Ink to stamp the Happy Birthday Sentiment from Joy Clairs Everyday Sentiments. The Card Base is from Recollections then there is a white 110 lb Recollection panel cut to 4" x 5.25", the stencil panel I cut to 3.75" x 5". I used double side adhesive to adhere the panels and the sentiment. The Daisy is adhered using foam dots. 


Stencils, Embossing Paste and Glitter OH MY!!!

Greetings friends and fellow crafters. LeeAnn here with a couple projects I have been working on for Gina at Gina Marie Designs. 

Gina has come with a new stencil line and let me tell you, I LOVE THEM. The stencils are 6" x 6" and strong plastic. I love the styles and enjoyed working with them. Out of the four stencils received I have one that I am going to show you today, another I will have later today for you. 

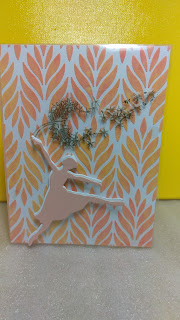
First I taped the Chic Style stencil down on my paper. For my project I used Recollections 110 lb card stock.

Used Barn Door colored Distress Ink and tinted my Ranger Embossing Paste. I really like the color it created. 

The next step was to removed the stencil and allow the page to dry for a few hours. 

Once the page dried I added Ranger Clear Glitter Embossing Powder and put my heat gun to it to dry. 

I cut the panel down to 4.25" x 5.5" and cut a piece of acetate the same size. Using Stazon ink in White and again in Black I stamped the Dandelion from Joy Clairs Spring Flowers stamp set, and used foam dots to attach the Gina Marie Ballerina Dancer Dies that I cut out of Coral and White.


 I then decided to use Gina's Wonky Stitches frame die to cut a frame to finish the design off.

I have to say, I am not sure how it happened but I LOVE the way that the embossing paste gave off an Ombre' look even though it started out all the same. 


Sunday, June 25, 2017

Relax and Unwind with Dare 2 Be Artzy

Greetings friends and fellow crafters, LeeAnn here with my first guest post with the D2BA team. Let me tell you it is such an honor to be chosen to work with these great stamps and dies.

For this project I have gone with using the Flip Flops stamp set.
The first thing I did was prepare my base. This was made using a White A2 size 110 lb card stock and an oval cut out, followed by a piece of Seafoam layering weight with a slightly larger cut out. 
Using my stamp positioner and Memento Tuxedo Black ink I stamped the flip flops and the sentiment. Using Zig Clean Color Real Brush Markers in 091 Light Gray and 003 Florescent Pink I colored the flip flops. With a few well placed enamel dots on the flip flops and the ... in the sentiment, this Clean and Simple project was complete. 

I hope you have enjoyed my project today. Again, thank you to D2BA for allowing me this guest designer spot.


Friday, June 23, 2017

SUNSATIONAL Stamps Whole Latte Love Coffee Hop 2017

Greetings friends and fellow crafters. LeeAnn here today joining the Summer 2017 Coffee Lovers Blog Hop with Sunsational Stamps.
#summer2017clh To see the rest of the team's project please go here


My project today is using the Love You Latte  digital image set.  To make my project I used my Silhouette Cameo software to trace the images, make the lines black and shrink to the size I wanted to use. I then filled the page size of 6" x 6". I sent this to my HP printer and then went to work.
My card base is Recollections 110 lb card stock A2 size. I then used K&C Company Pastels Color Basics card & Mat pad which I cut down to 4 x 5.25. I cut the panel I printed to 3.5 x 5.25 and used double side tape to adhere it all. 
The sentiment I cut using my paper trimmer. 


As a Super Sponsor, we are offering a $25 dollars Digital Image Gift Certificates and two flash prizes of $15 and $10 Digital Image Gift Certificates.  Be sure to join in on the fun and link up your coffee loving projects to play along on the Coffee Lovers Summer Hop inlinkz#summer2017clh


 I hope you have enjoyed this project, I had fun making it. 


Joy Clair Coffee Loving Hugs Summer 2017 Blog Hop

Greetings friends and fellow crafters, welcome to the Summer 2017 Coffee Lovers Blog Hop. I look forward to this project every season and the challenge of coming up with new ideas using Joy Clair Stamps. 
As a Super Sponsor, we are offering a $25 dollars Gift Certificate for this edition to shop with us at Joy Clair Store! Be sure to join in on the fun and link up your coffee loving projects to play along. We can't wait to see all the coffee loving creations.

Today I decided to mix up two of the Joy Clair stamp sets to make my project. 

The paper is Recollections 110 lb weight. I stamped with GinaK Dark Chocolate Dye Ink and colored with Spectrum Noir Markers. 

The Hedgehog is from Hedge Hogtastic and the Coffee Cup is from Coffee Lovers.

SPECIAL PRIZE!!!


Who wants a chance to win a SECOND $25 gift card to the Joy Clair store? All you have to do is comment on this blog and all the Joy Clair design team members' blog. The winner will be announced on the Joy Clair blog at the end of the month!

Tuesday, June 20, 2017

Addicted To Stamps & More Happy Birthday #247 Make Your Mark

Greetings friends and fellow crafters. Today I am here with ATSM and Challenge #247 Make Your Mark with a Birthday Theme.
For this post I decided to use Joy Clair's Let's Celebrate stamp set.


I used 2 of the balloons, the 2 strings, Celebrate and Happy Birthday. I stamped with Ladybug Red and Magenta Purple Ranger Dye Inks to bring the balloons to the page and colored them with DR2 and HB3 Spectrum Noir Markers. The sentiments are stamped with Onyx Black Versafine ink.
Skin- FS1, FS2, CR2
Hair- TN2, TN3, GB1
Dress- LV1, PP5, DR2
Shoes- True Black & Black Wink of Stella
Hair Bows- DR2

 I hope you have enjoyed this post, I look forward to seeing everyone's entries over the next couple of weeks.

Joy Clair Land of the Free Home of the Brave


Greetings friends and fellow crafters, LeeAnn here with my contribution to the Joy Clair Patriotic Blog Hop. 

I chose to use images from both sets the Flag and the 4th of July to complete this banner which is now hanging on the inside of our front door for all to see that drives past. 

To complete this project I stamped the flag 3 times using my stamp positioner so that I could restamp as needed to give good coverage. This is a big 4x6 stamp so that made life a bit easier having the positioner so that it would restamp in the same place each time. 

I then cleaned up my mess and started with the 4th of July stamp set, and stamped the larger Firework first and used WOW embossing powder and heat set it. I then stamped the smaller fireworks and heat set them with Silver embossing powder. I followed that with stamping the sentiments using Black Onyx Versafine Ink. Once I was sure everything was dry I used a tag die to cut out the banner images I had stamped, and then used my paper trimmer to cut the backgrounds a 1/4 inch larger all around. I used my hole punch to make 2 holes in each panel and strung it with some white ribbon lace. 

I hope you have enjoyed this project, be sure to hop along and see the rest of the teams projects and how they made them. Leave a comment on each blog and you will be eligible for a $25 gift card Joy Clair Gift Card.

Here is our LINE UP for this hop. If you came from Donna's blog you are in the right place, If you are starting here, please be sure to start at the beginning with the Joy Clair Blog so you hop to all the posts.


Steph is up next with a great project for you, please again be sure to comment on each blog to be entered to with the $25 Joy Clair Gift Card. Thanks for hopping, have a crafty day. 

Quick Quotes Fathers Day Mini Album Fun

Greetings friends and fellow crafters. LeeAnn here with a Fathers Day project that let me just say, I started it three times before finally coming up with a plan I really liked and wanted to share. One of these days I will have to do a bloopers post. 

SO, Fathers Day was just a couple days ago, however I will not see my son in law until today so it worked out perfect with timing. 

I used the Quick Quotes Club Q June Anchor's Aweigh Collection to make this project and now I really love it and have to make another for myself. What was really great about this project is it gave me the opportunity to use my Canon Selphy printer again, and I love doing that. 
The first thing I did was grab all the pre-made tags from the kits, this made it easy to start as part of the work was complete. I do have tag dies so I could have made them myself, but hey... I'll do that for the next one. 

 I then used Anchors Aweigh QQP-AW100 and cut 2 strips that were each 3 inches high and 12 inches long to serve as the backing for the tags. I liked this paper as it has the really pretty aqua blue on the one side and a pretty sea shore design on the other. 

From there I grabbed my Joy Clair "Father's Day" stamp set and cut a white panel to put in the inside, and then stamped "Happy Father's Day" using Royal Blue Powderpuff Chalking Inks

I used a number die set to cut out the numbers 2017 and used my Xyron X to adhere them to the appropriate pages.

The chipboard sentiment is from AW802 Chipboard Set.

The Happy Happy Happy sentiment is from the Anchors Aweigh QQP-AW500 sentiment sheet. 


I hope you have all enjoyed this project, it was a fun one to make and hopefully my son in law will like it as well. He is in the Coast Guard and this Nautical Themed paper is perfect for projects I can make for him. 

QQ ITEMS USED:

Non QQ Items Used:
Joy Clair - Father's Day
Xyron X
Ms. Sparkle & Co. Double Stick Tape

Sunday, June 18, 2017

Sunsational Fun with Fireworks!!!

Greetings friends and fellow crafters, LeeAnn here today with my Patriotic Inspiration. Fourth of July is coming up and making cards for the local recruiters office, I figured why not get busy. So, using Sunsational Stamps Digital Image called Fireworks Couple I decided to get busy. First I set up my printer to make 4 sets, then used my Scan n Cut to cut hem all out leaving a slight border. I do this so that I can file the extra images away for later use. 


In order to make my card I use Distress inks in Peacock Feathers, Mustard Seed and Seedless Preserves to make the background, Layering, smoothing and then let it dry. I then cut this panel to 3.75" x 5". I cut a white panel at 4" x 5.25" and my base is A2 size of 4.25" x 5.5". 

Today I used a combination of Spectrum Noirs and Bic Mark-Its as well as Sharpies and even a Wink of Stella and Luna to complete this project. 

I hope you have enjoyed this project. If you haven't checked out this months Challenge, please jump on over HERE to link up your project, our theme for this month is SUMMER. 

Dockside Fun with Dare 2 Be Artzy

Greetings friends and fellow crafters. LeeAnn here today as a guest designer with Dare 2 Be Artzy.
Today I am going to be using the On The Dock stampset to created my project.
For my project I used the Dock image and the Subway Art sentiment, I thought they would go great together.
To begin, I used my stamp positioner to stamp the dock in the lower left corner, I then turned the stamp around and used a little masking tape to not stamp over what I already did, and stamped the image again, lining up the best I could to have the dock extend off the edge of the paper. Using Mermaid Lagoon distress ink I colored the background in a sweeping motion direct from the pad to create a lake type view with high and low spots.
Using Rusty Hinge distress ink I colored the dock running off into the water a bit to give a reflection.
Finishing up I used Memento Black to stamp the sentiment.

I'm not sure about you but this makes me want to head off to the lake right now, if only the boat wasn't in the shop.

Thank you for coming by, please come again soon.

Friday, June 16, 2017

Self Inking Custom Stamps Made QUICK

SO, I applied for a new companies design team in December 2016, and although I did not make the team, they were gracious and gave a gift certificate for a custom stamp from their shop. I was quite excited about that as I did need to get some made for my envelopes when sending out Happy Mail. 

I decided on the FLAG UP Mailbox Return Address Stamp, and in the mail box I write my name each time. 


I have now used this stamp for almost six months and it is still as juicy as the day it arrived. It is in self contained packaging so all I have to do is take off the cap and stamp down, then replace the cap. No fuss no mess. 

The model number of the type I chose is Round Ideal 400R


I love the fact you have ten fonts to choose from, and eight colors as well. Shipping was very fast, I had the stamp four days after placing my order. 

SO, if you are looking for a re-inking custom stamp to be made, Simply Stamps is a company I will highly recommend. 

If you are asking yourself why I waited months before writing this post, I wanted to be sure to give a good review with appropriate information. Anyone can receive a product, use it once or twice and give a review. I gave this baby a workout and know it is good and feel confident to add Simply Stamps to my list of recommended companies. 

Thursday, June 15, 2017

Awesome Easy Ways to Utilize Hardware Supplies in the Craftroom

Greetings friends and fellow crafters, just a quick post today that I wanted to share with you.
Last week the husband and I went to Lowe's (GO JIMMIE JOHNSON #48), and I was looking for magnet sheets, well they were out so we went to Wal-Mart. Over in the air conditioning filter section I found the magnets I was looking for. Deflecto 5" x 12" 2 in a pack for less than $3.


I brought them home and promptly lost them. 
Today I started looking for them and there they were, of course still in the Wal-Mart back on the loveseat in my craft room. SO, then the fun started. I cut each magnet into 4" x 5" rectangles. 


I then started putting my dies on them, and put them in page protectors purchased at Staples they are 5.5 x 8.5.


Now on to other craft room hardware store finds. 

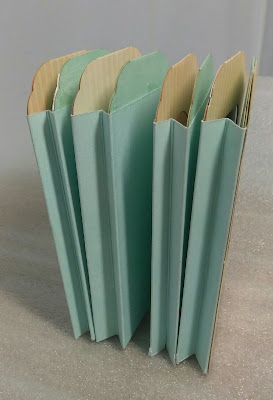
My workbench from Harbor Freight, my husband bought it for me a couple weeks before Christmas last year for $67. This thing is great, pegboard, 2 big drawers, shelf on top, shelf below, a bar light under the top shelf and a 3 outlet plug on the left side. 


On the top shelf you can see the Tool Caddy also from Harbor Freight $11, normally for nuts/bolts/screws. I have my Kat Scrappiness Sequin collection in there, and all the drawers are used.

In the green photo frame is my original die storage have used for 2 years now, also a magnet that is 8 x 10.

Hope this has helped to give some inexpensive ways to get your room organized.

Wednesday, June 14, 2017

Joy Clair- Flawless and Be-YOU-tiful

Greetings friends and fellow crafters, LeeAnn here today with Joy Clair and this great stamp set from the Color By Faith line called Flawless.
Flawless
This set is perfect in many ways, I can see using it with Teen Birthday cards, and Bible Journaling. Today I made a fairly simple project, and am happy to share it with you.


Making this project I used the small flower from this stamp set, and using Versafine Black Onyx ink I stamped this flower all over the card base. I then used my stamp tool and stamped 5 images of the lipstick with Memento Tuxedo Black and with my Spectrum Noir Markers CR3, CR6, BP2, DR1 and DR7 and colored one top with each. I followed that up with Wink of Stella in Silver for the lipstick tube and Wink of Stella in Black for the base. The next step was to use a rectangular stitched die to cut out each lipstick into its own section. Once all this was finished I used double stick tear tape to attach each rectangle across the base. I used Recollections Ombre' Ink to stamp out the Be-YOU-tifuL and positioned it along the bottom of the card. Finishing touches were made by using On-Point Glue to attach the little half pearls in the center of each flower as  I remembered our technique for the month was to use bling.

I hope this post has given you some inspiration to use this set. If you would like to see another project I made earlier with this same set you can just click here.


Tuesday, June 13, 2017

Joy Clair, and I'm Sorry

Greetings friends and fellow crafters. LeeAnn here today with a card I challenged myself with. Wanting to get more use out of some of my stamps I decided why not see how many Joy Clair stamps I can use on one card, and keeping it looking good. So here it goes...

Can you figure out how many sets I used to make this fun card? Well I am going to tell you, and what I used of each set with the set linked up.
Butterfly Kisses- left side butterfly
Designer Labels- Small Flowers and Butterfly
Every Day Sentiments- I'm Sorry
Grow With Faith- flowers
Let The Light Shine- Sun
Puppy Love- Puppy & Paw Prints
Song of Solomon- Birds
Speech Bubbles- Clouds
Wood Background- Fence

So, in order to make this project I stamped out all my images in the colors I wanted and then using my Scan N Cut and cut them out. I then sat for a couple hours to decide exactly what I wanted to do as far as the finished layout,
I used Tumbled Glass and Broken China distress inks to make the sky, then used On Point Glue to affix the right side cloud, a thin foam tape to affix the sun and then thicker foam dots to affix the left side cloud, in order to give multi layer dimension.

Using double stick tape I affixed the fence, and the grass panels. I then went back to the On Point Glue and added the remaining elements. Foam dot on a couple of paw prints and sentiment bubble with foam tape on the pup finished off this 5x7 card.

Sometimes, we do something that we aren't proud of and need to apologize for, and sending a card as cute as this should hopefully help.

Hope you have enjoyed this project, please come back again to see the next project.

Sunday, June 11, 2017

Graduation Time

Greetings friends and fellow crafters. It is June and many great kids have graduated this year, I made this project in honor of all of them, Ashley (college), Taylor and Brianna (high school), Dominic (pre-k) and most of all my daughter Megan and her fiance Danny who will graduate from College in August. This color is made not only in the colors from my daughters High School but also the University she is receiving her Bachelor's degree from. 

This project is entered in the http://tictactoechallenge.com/tttc0001-welcome/  challenge #tttc001  #tictactoechallenge  Entry 19

Products used... 
Stamp AnnieThing stamps... Annie You Did It
Spectrum Noir Alcohol Markers
Gold Metallic Sharpie
Bakers Twine
Recollections Gold Foil Card Base
Virginia Turtle Gold Glitter Enamel Dot
Darice Graduation Embossing Folder (black layer)
Recollections 110 lb white card stock

Tidal Worries with Dare To Be Artzy

Greetings friends and fellow crafters. LeeAnn here today in my guest spot with Dare 2 Be Artzy. I really have had a great time with these stamps and dies, and appreciate the opportunity to work with them.


Today I used the Flip Flops stamp and die sets in my project.
In order to make this project, I first ran the top half of my card topper through my Big Shot inside a Darice embossing folder to get the cloud feature. I stamped the chair on a piece of green cardstock and then rant it through the big shot as well using the die from the set.
When this was complete I used Tumbled Glass distress ink to create the cloudy sky. I used Dried Marigold to create the beach sand look and Mermaid Lagoon to create the water. With a swiping back and forth motion I created it to appear there were white caps on the water as the tide was coming in. With a big of the water washing over the the shoreline. I used Bahama blue to stamp the sentiment and cut with my trimmer to size, adhered with foam tape.

I hope you enjoyed today's project and I really think this needs to be a beach day.