Saturday, November 14, 2015

Prayers for Paris

While I am not a writer, and will never pretend to be. Here I sit writing about the senseless tragedy that took place in Paris, France yesteray (11/13/2015).
I will be honest, sitting here in my craft room playing on the computer I saw a message from someone pop up that only said "Prayers for Paris". Many things went through my mind... great something happened to another wanna be celebrity and people are going to make a big deal about it was the first. Then I did a little research (turned on CNN) and there it was... shock, dismay and anger all at the same time.
I wanted to do something, but here I am across the pond, and other than prayers not much I could offer. So for those families, friends and coworkers off the people who lost their lives, or are battling for their lives in the hospitals now... this card is for you :
It isn't much, but it is from my heart. It won't bring your loved ones back, but hopefully it will give you a little solace knowing that someone is thinking and caring about you.


Thursday, November 12, 2015

Laura's Loft Shop & Hop- "Winter Wonderland"


https://lauras-loft-shop.myshopify.com/

http://debbielovestocraft.blogspot.com/2015/11/winter-wonderland-with-lauras-loft.html

COUPON CODE: 
We have a coupon code for this hop AE20% which gives you 20% off Avery Elle products and ends on 11/28/15.


If you arrived here from Debbie's blog I am sure she had a fabulous creation for you.  If you missed Debbie's stop, then please click the previous button above and check out her work.
Hi there hoppers, today we are hopping with Laura's Loft, and I am happy to share with you my creation using Avery Elle's "Snow Much Fun" stamp set, WOW "HOHOHO" embossing powder and our own "Baby It's Cold" sequins. But first, we have two fantastic guest designers. 
and
Now that you have seen there wonderful creations... here is mine :)


 First I used my Silhouette Cameo to cut the designed card base. I then stamped and cut the fun little characters from the stamp set, and colored with Spectrum Noir alcohol pens. The scarves were colored with my versamark pen and WOW "HOHOHO" embossing powder was added for that bit of color and sparkle.  Pop dots were used to give some dimension to the sledding duo. The background was colored with Peacock Feathers Distress ink. Pieced it all together using Tombow Mono Multi liquid glue as well as my ATG gun.

Links to items from Laura's Loft:

COUPON CODE: 
We have a coupon code for this hop AE20% which gives you 20% off Avery Elle products and ends on 11/28/15.

Laura
Debbie -
LeeAnn McKinney- YOU ARE HERE

Now... after you leave a comment here on my post, please just hit the next button and hop on over and check out what Lisa has done for us this month.  

http://royalpumpkinart.blogspot.com/2015/11/winter-wonderland-with-lauras-loft-shop.html

This months giveaway is great, and I can't wait to see who wins. The requirements are not hard... actually quite easy and only 4 steps...

TO ENTER:
1. Follow Laura's Loft on IG @InLaurasLoft, like the IG Hop/Giveaway post and tag a friend. as many as you like but one tag per comment
2. Follow Laura's Loft store page on facebook https://www.facebook.com/Lauras.Loft.Shop
3. Leave a comment at each stop on the blog hop
4. After doing these 3 steps, go to Laura's post and fill out the rafflecopter to be entered!!


Thursday, October 22, 2015

Friendship

Sometimes I can sit down, read a challenge and just go to work and get it done. Yet, other times I sit and think, and think and it takes hours. I read the rules for this one yesterday and finally today it clicked. 
The challenge is to use an image depicting a friend or family relationship and/or a sentiment focused on relationship (mom, sister, friend, etc).

Here is my card... first the outside then the inside. 

 Products used:
Georgia Pacific Bright White Premium Cardstock
Tim Holtz Distress Inks: Pickled Raspberry, Dusty Concord, Tumbled Glass, Mowed Lawn, Tea Dye
AMuse Ink & Paper: Navy
Stamp-N-Stuff: Sahara Pearls embossing powder
Stamps: So Suzy, Virginia Turtle, Lawn Fawn and Simon Says Stamp. 
Silhouette Cameo and Big Shot

Wednesday, October 21, 2015

Lawnscaping Challenge: Too Cute To Spook

Lawnscaping Challenges is doing a "Too Cute To Spook" challenge.
So "scary" Halloween has never been my thing. I don't like horror movies, haunted houses or gore. Most expect that from this candy filled holiday. But I am fine without it. Perfect  Halloween for me is Mickey's Not So Scary Halloween Party.

So for my 'Too Cute To Spook' card I decided to have a ball. Using the Lawn Fawn "Sweet Smiles" stamp/die sets I used some Black Onyx Versafine ink and stamped on Neenah white cardstock. Once all was stamped I used the big shot to cut out the Gumball Machine and 12 gumballs, colored and colored with Bic Mark-its and Ganzi Tambi Watercolors. I then stamped out 6 cute gumball figures from a Sweet Shop Planner stamp set, colored with both Bic Mark-its and Ganzi Tambi Watercolors.
"Happy Halloween" sentiment is from Virginia Turtle Designs.
This was a fun project and I had a great time making it. I hope you enjoy it as much a I do.

Items used:
Lawn Fawn "Sweet Smiles" stamp/die
Sweet Stamp Shop "Lets Face It" stamps
Virginia Turtle "Happy Halloween"
Versafine Black Onyx
Bic Mark-Its
Ganzi Tambi Watercolors

Tuesday, October 20, 2015

PINKALICIOUS is the word!!!

PINKALICIOUS

The newest challenge is to unscramble the word PINKALICIOUS to make three or four words to use in or on the project. SO... here we go Pink of course, Lion, Ink, and CIAO... I really had fun with this one. 
 Using a 3 step build a lion stamp from Stampology and GinaK honey mustard ink stamped the first layer, second layer with Tim Holtz tea dye, and the final AMuse bubblegum. The palm tree is from Hero Arts stamped with GinaK dark chocolate and AMuse grass inks. 
I then used contact paper to mask of the top so I could use mowed lawn for the grassy mound. Another section of contact paper was used to mask off the lion and tree while I used tumbled glass for the sky area. 
After removing the contact paper I went back in to fill in sections with the inks that were missed, this also created somewhat of a shadow effect. 
I then put the final touch on with CIAO, this little piece is from a card making package I received on my birthday cruise this year, during the cardmaking class that my friend and I were the only ones to show up to. I used a project life die to cut out the banner piece, the pink layer is a post-it note that I also used the banner die to cut. 

Hope you enjoy the first creation of the day.

Monday, October 19, 2015

Stamping Smiles Tic Tac Toe Challenge

I have to say this was fun. The idea for this challenge is to create a card while winning the game. How do you win the game, 3 in a row of course. I have never played tic tac toe by myself, so I had to improvise. I remade the board and held 2 markers up let them go, once the game was won, that would be the methods used to make my card.
So, yellow won, I would be making my card using Forest Friends, Embossing, and Woodgrain at minimum, I also hit on leaves so figured I would throw them in as well, and to tie it all together I used "Thank You" as the sentiment.
Products used in this project were Woodgrain embossing folder on kraft cardstock. GinaK Dark Chocolate Dye Ink to highlight the texture of the woodgrain.
Tod is my little fox, he is a stamped image from inkadinkadoo, stamped in AMuse Studio Orange pigment ink and embossed using Whispers Orange embossing powder. Tod's background was done with Mowed Lawn and Tumbled Glass Distress Inks.
Copper is my puppy, he is a clear inkadinkadoo stamp that I embossed using Whispers Copper embossing powder, and colored his highlights with a honey brown bic mark-it.
The leaves were cut with Impression Obsession Rake/leaf die on colorbok Autumn Leaves paper.
I used a project life frame die to cut out the window of my card base so that the two friends could see each other.
The ladybug in the corner of the window near Copper is  a sparkle dot from Virginia Turtle Designs.

I really had a great time with this, and look forward to more fun in the coming months :)


Krafty Mimi Button

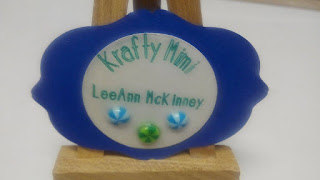
I am krafty, (love the spelling); I am a Mimi; so my button will read Krafty Mimi... I have seen so many cardmakers with their own buttons for their blog photos and I wanted one myself, so another project for today was to make one.