Thursday, January 11, 2018

Tic Tac Toe with Kennedy Grace Creations

Greetings friends and fellow crafters. LeeAnn here today with my project inspiration for Kennedy Grace Creations using the Tic Tac Toe board. I sure would love to see you playing along and posting your projects over on our Facebook Fan page

Using the Tic Tac Toe board below, I went with a straight line down the left side using Die Cuts, Twine and Buttons. 
The stamp set I chose to use is Sing A New Song, not sure about you but I am ready for winter to be over. I am a Florida girl, and do not care for cold weather. And the last couple weeks has been too cold for my bones. So this stamp set made me happy for my favorite season of the year. 
First I stamped the tree image with the hanging bird house. I used masking fluid to mask it off and spritzed with Summer Sky Shimmer Spray from Imagine Crafts. I removed the masking fluid and went about stamping the remainder of my card topper.
I used Memento Tuxedo Black to stamp the flowers, and the tree, and Memento Dandelion to stamp the sun.
I used Rich Cocoa and Desert Sand Memento Markers to color the tree, and Cottage Ivy with Pear Tart to color the leaves. The Bird House is Desert Sand, and Rhubarb Stalk. 
The sun is colored with Spectrum Noir FL3.
A bow made of twine to appear to be wrapping the tree, button brads for the flowers, and stitched dies for the land completed the requirements, then I went for one more square the rhinestones.

The idea for this card and the use of the "Thinking about you" sentiment, came about because just this week we had National Guard Troop 128 deploy overseas, and that always makes me think of the song "Tie A Yellow Ribbon" Some say the song is about a guy getting out of jail others say military, I just remember loving the song as a child and we had a ribbon out when my uncle came home from overseas.

I hope you have enjoyed my project today and look forward to seeing what you have to make. 


Saturday, January 6, 2018

Drinking in 2018 with Tape Technologies


Greetings friends and fellow crafters, LeeAnn here with my first post of 2018 with Tape Technologies. For January we are usign the UltraFX Vinyl which is so great that I knew up front a New Year's project was in order.
This  year we decided to keep it quiet, I was home in my craft room getting plans ready for 2018. I decorated these Champagne Flutes for my brother in law, sister in law, nephew, husband and myself using UltraFX Vinyl and my Scan N Cut.
This information is straight from the Styletech site:
"NEW Ultra FX colors are almost indescribable. The colors are unique, yet very appealing. The Glitter effect is great, but then… something more. Only seeing is believing."
I really wish you could see the effect in these glasses as it is amazing. 


I put Happy New Year on one side and 2017-18 on the other of each flute, and made little hang tags with each person's initial so we would not confuse our flutes. Now, my sister in law and I have the same first initial, so her tag is round while mine is square, and our husbands match ours.

I hope you have enjoyed this project, and see how easy it is to use this vinyl to make your own designer Champagne Flutes.

Happy 2018 and see you next month. 

Friday, January 5, 2018

Need Hugs with Evaney's Stamps

Greetings friends and fellow crafters. LeeAnn here with my first post with Evaney's Stamps
This little company is great and I was happy to be chosen as one of the designers for the first quarter of 2018. You will find a new post from me every Thursday through April. 
Today's post is using the stamp set Prickled. I was looking at the site and this set caught my eye as one I had to have, the characters are adorable and the sentiments allow for it to be used for various occasions. 
For my project I decided to make a shaker card. For my paper I used white 110 lb Recollections card stock as my base, 65 lb red for the first layer and 65 lb designer from a Valentine pack purchased last year as the top layer. 
I used the dies from the Christmas Celebration Die set to make the shaker element. First I cut with 110 lb Recollections white, then I cut with adhesive backed fun foam for the spacer layer. I used a circle die that was sized between the two layers to cut a piece of acetate to finish the shaker part. 
I used Memento Tuxedo Black Ink to stamp the Cacti, and colored using Memento markers. The Cacti is colored using Bamboo Sprout and Pear Tart. The pot is colored using Potters Clay and the water bottle is colored using Summer Sky and Bahama Blue. The hat I used Tuxedo Black and Ladybug Red for the flowers on the hat. 
I added some red sequins from Amuse Studio's and assembled my card. 
The sentiment banner is stamped using Memento Ladybug Red.

I hope you have enjoyed this project today. Please be sure to check out the other fun products at the Evaney's Stamp Designs website. 

#evaneysstamps
#designteam 
#stamps 
#papercraft

Wednesday, January 3, 2018

Love You Tons with White Rose Crafts

Greetings friends and fellow crafters. LeeAnn here with my first post of 2018 and my first post as a first quarter guest designer with White Rose Crafts.
White Rose Crafts is an online store in Virginia, USA that carries a great variety of product, including some favorites from UK.
So, for my first project I decided to dig into my stash of stamps and find some I have had for a while but never used. It's a great thing to have product the company sells when you join their team as you can get started while waiting for your design team package.
ANYWAY... for todays project I used Lawn Fawn's Love You Tons stamp set.

Using Recollections 110 lb red card stock as the base topped with a layer of 110lb white, and a 65 lb sheet from a 6x6 Recollections paper pack called "Be Mine Valentine".
I stamped the Elephants with Memento Tuxedo Black and used the dies to cut them with my Big Shot. I then colored using my Memento marker in London Fog. I doubled up on the lines to add shading.
I cut a 1" x 4" piece of 110 lb white card stock, stamped the sentiment in Ladybug Red a well as the hearts at the beginning and end of sentiment and above the elephants trunks. The row of hearts under the sentiment is a strip from the paper pack.

I hope you liked today's project. I will be back again soon, with another project from White Rose Crafts.


Saturday, December 30, 2017

Fun With Peek A Boo Designs

Greetings friends and fellow crafters. LeeAnn here with my December post for Peek A Boo Designs.
This has been such a busy/crazy month, however I hope everyone had a great holiday season, whichever holiday you celebrate. 

For my projects today, I have first made a file for my rolodex for the groomer we use for my boys Chase and Harley.

To make this I took a rolodex card, stamped the puppy and the boy with puppy images from the Vet Me stamp set in Memento Tuxedo Black ink. I then used Memento markers to color the images. After writing the information for my groomer, I placed it in the spot within my rolodex. 

 Next up was my planner page for this week. I started off with Dreamy Unicorn washi tape on the right side border, because who doesn't love unicorns? I then used Planner Fun washi tape on the top border and in boxes where it seemed fitting. I love this tape as each day is perforated and easy to use. 
I stamped the Holly image as well as the Merry Christmas and Happy New Year sentiments from the Poinsettia stamp set, and colored the Holly with Memento markers. 
 For this project I used the A Little Note stamp set, I stamped out the pretty flowers using Memento Tuxedo Black ink, I then used my Gansi Tambi watercolors to paint the image. I used a Nuvo blender brush to add Broken China Distress Oxide to the background. I used the Stitched Ticket die set to cut out the largest and second largest sizes to make my layers. I stamped the Hello Sunshine from this same stamp set, and used the 3rd smallest die from the Dome Tower set to cut it out with my Big Shot.
This one is a bit different, and I really like the way it turned out. Using Wintery Poinsettia washi tape and the tree branch from the Poinsettia set, I made a Christmas tree stamping in Cottage Ivy Memento Ink. I used Rich Cocoa Memento pen to add the trunk.
I then used various colors of Nuvo drops to add baubles to the tree for decorations. The Holly in the top corner was colored using Lady bug and Cottage Ivy as well as a little Bamboo Sprouts Memento Markers. I topped it off with the sentiment in Memento Tuxedo Black, and this project was complete.   

My final project is actually the first one I had made for this post. Using the small layer for the Poinsettia stamp set I stamped the image multiple times for a background which I colored using Prismacolor Pencils. I then on a separate page stamped the largest and smallest again, as well as the holly leaves, and cut them out using my scan n cut. 
I adhered the layers using foam tape and placed the leaves where it seemed fitting. The Merry Christmas sentiment came from this Poinsettia set as well. I then added Gold Nuvo Drops to the centers to finish off this project. 


Peek A Boo Designs Products Used:
vet me
Dreamy Unicorn
Planner Fun
poinsettia
a little note
Stitched Ticket
Dome Tower
Wintery Poinsettia

Wednesday, December 27, 2017

Joy Clairs 3D Poinsettia with LeeAnn

Greetings friends and fellow crafters. LeeAnn here with my final post for the Joy Clair 2017 team. 


For this post I used the 3D Poinsettia set and my new Prismacolor Colored pencils. Using my stamping press I used Memento Tuxedo Black and stamped the smallest part of the flower, and then covered it with masking paper and stamped the next layer, I did that with 4 layers and then stamped the leaves while all was masked. I used an acrylic block and stamped the vine sections as well as the holly berries. This is going to be a great set for many years to come. Thank you Joy Clair for all the great sets you keep coming out with.


 Please follow Joy Clair's facebook pageColor by Faith Bible Journaling facebook pageInstagram and Twitter, be the first to hear the news, sales and giveaways! They also have a Pinterest page and Youtube channel for your inspiration!
Thank you for stopping by and please come back again soon!

Saturday, December 23, 2017

December Hero Arts-Simon Says Stamp Entry ABNH

Greetings friends and fellow crafters. LeeAnn here with a project I made for the A Blog Named Hero December challenge with Simon Says Stamps. 


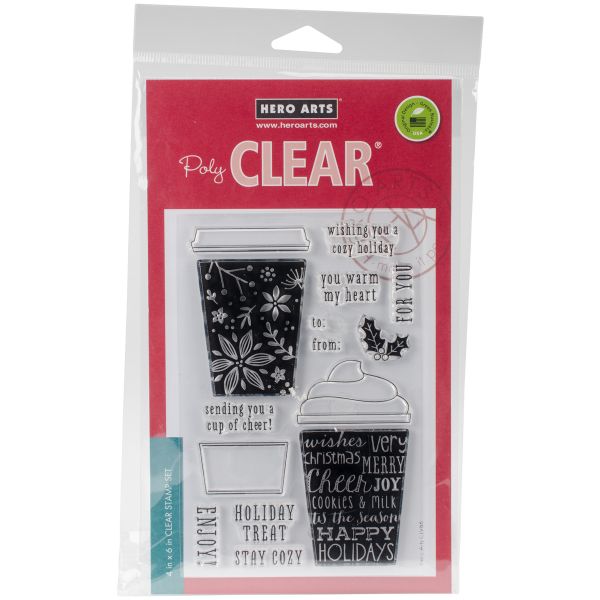
 The Simon Says Stamp set I used is fairly old (2014) and called Happy Every Day. And I paired it up with Hero Arts (2016) Coffee Cup Tags.
Image result for simon says stamp happy every dayHero Arts Clear Stamp & Die Combo
 I started out with white 110 lb card stock and using Distress Oxides in Lucky Clover and Cracked Pistachio I layered to get the color I actually wanted. I then used Versafine Black Onyx and two of the stamps from the Happy Every Day set to create a plaid background, I heat embossed using Black Nuvo embossing powder.

I then used Lucky Clover to stamp the "Hoping you have an amazing" sentiment on white 110lb card stock, and used my circle dies to cut out the white and a larger red layer.
I stamped the coffee cup using Memento Lady Bug, and the sentiment with Versafine Black Onyx. I layered my card up and attached to the card base, added a few enamel dots and my project was complete.

I hope you enjoyed my project today. Have a great day.